What's it all about?
This blog is about photography and photoediting. Its purpose is to provide hints and tips and links to interesting and useful resources for digital photographers, regardless of their level of expertise or experience. It is aimed at people who use digital SLR cameras and who process their images using the latest versions of Adobe Photoshop and Adobe Photoshop Lightroom.
The author of this blog is Glenn Springer and you can read more about him at his web portal at faczen.com. Information on workshops, and links to everything is at photography.to. Glenn's original blog, which is an ongoing journal of his photographic meanderings goes back to 2006 and contains many additional hints and tips, as well as representative images that he has made. Gallery quality prints are available through his Smugmug gallery site. It is an interesting place to visit to see a variety of quality images, as well as an ongoing general journal of photos going back several years.
Photography workshops are scheduled every few weeks starting in the Spring. For an overview of what's happening, please visit the photography.to website.
The most recent blog post is below. Scroll down to the bottom to see the list of previous postings or search for any particular topic.
Wednesday, December 12, 2012
Auto ISO HDR Bracketing
First a disclaimer: I don't believe this works with Canon cameras, but not being a Canonista, I can't try it to find out. Perhaps one of my readers can test it and post a comment here.
As a second disclaimer, I've only tested this on the Nikon D600 but I have been informed that Auto-ISO has been available since the D200. Again, if someone has a D200, D7000, etc., perhaps they might try it and let us all know.
Now a little background.
The 'accepted' way of doing HDR's is to bracket a number of exposures around what you choose as the nominal value, and blend them using one of a variety of programs, including Nik HDR Efex Pro (my favourite), Photomatix Pro, or HDR Pro inside Photoshop (CS4/5/6).
We are told that the camera should be on aperture priority (or manual, Nikon changes the shutter speed in manual, not the aperture) because when you blend images taken with different apertures, you introduce a lot of chromatic aberration and create difficulties aligning all elements of the image because of the changing depth of field. That doesn't mean you can't or shouldn't use a fixed shutter speed and vary the aperture: after all you're free to experiment however you wish and of course rules are made to be broken.
Here's the problem. Suppose you're shooting a scene handheld in aperture priority with a 200mm lens and you've chosen f/8 for maximum sharpness, and a nominal ISO of 400. On a given day, the nominal shutter speed might be 1/250 sec, let's say. That means that all other things being equal, your -2EV exposure will be at 1/1000 sec but your +2EV exposure will be at 1/60 sec. Your +2EV shot is going to exhibit camera shake, even if you have VR (Canon IS). So you can't really use those settings, you're going to have to bump the ISO up a couple of stops, or open the aperture.
But then you'll be bumping up against the fast limit of your shutter speed (1/2000? Varies from camera to camera).
This occurred to me while I was experimenting with auto-ISO, shooting a 400mm lens. I KNOW I can't shoot sharp pictures with that lens under 1/500 sec and fiddling with aperture under varying conditions was a pain, I really wanted to set that depth of field. So I thought, "change the ISO". It works.
With earlier cameras, there's a limit of how high you can go (ISO) without introducing unacceptable noise. Well, that's true on all cameras, but the D600 seems to handle it better and I've even had acceptable shots in certain conditions at ISO 6400! So I set about trying it and sure enough, it worked.
So why not try it when shooting bracketed for HDR?
In this image, I achieved the effect I was going for. Yes, there's noise in the sky, mostly introduced by Topaz when I tried to get some detail in it. I did balance some sharpening and noise reduction in Lightroom 4 in the normal course of post processing it.
Here's another image:
Another feature in the D600, and again I'm not sure about other models, is the ability to set the minimum shutter speed when you turn auto-ISO on. You can also set that to "Auto", which keys the minimum shutter speed to the focal length of the lens (you can shoot slower with a shorter lens without introducing visible camera shake).
I've read here and there, that you shouldn't use high ISO when doing HDR blends. Probably true, but sometimes it's better to trade off high noise for increased depth of field and a faster shutter speed. It's your call.
Do I feel as though I'm using too many auto settings? Am I going back to being an amateur snapshooter? Not at all. If the Gods (I mean Nikon) didn't want high end shooters to have these capabilities, they wouldn't have built them into the D600. Furthermore, I'm making all the decisions: in this case I just want to limit the shutter speed and let the camera make changes to other settings on the fly, without having to worry about bumping up against traditional limits. I'll do more of these. Count on it.
Wednesday, October 24, 2012
The Great Filter Debate
 |
Nikon 70-200mm f/2.8 VR lens. Even though this is the older version, it's probably worth the better part of $2000 on the used market. In front of it: a B&W UV filter that cost less than $100 |
Why did I have it on there in the first place? Well because "EVERYONE KNOWS" that it would be cheaper to replace a $100 filter than a $2000 lens if you smash your lens into a wall or drop it on a rock. And 'way back in the film days, we were told such a filter would cut through the haze and make your landscapes crispier and contrastier, wouldn't it?
One day, I was shooting something in the studio (I remember where I was and why I did it, but no other details: I admit it – I'm getting old!) and I was pointed into some back lights and I could even see the ghosts on the LCD and I took the filter off to minimize reflection and glare and, well, it did. And somehow the shot was crisper and cleaner. So I thought about it, went outside and took some shots with the 70-200 with no filter. Maybe it was my imagination, but I had the impression that FINALLY, that lens was living up to its reputation. Brilliant.
I took all my UV/Skylight filters off. They haven't been back on since.
The big argument is, of course, that the filter was disposable glass that would protect your lens like the crumple zone and frangible bumper on your car. Well yes, maybe: but I've been shooting for over 50 years and damned if I can remember EVER dropping a lens or banging it into anything. Even if you did, you had a lens hood on that would protect it except from a direct impact.
I can see that if you're crawling through the mud in a rice paddy 2 klicks North of Ta Con airport outside of Khe Sanh, you might want to have some extra protection for your lens, but this isn't 1968 and anyway, I won't admit to having been there (just threw that in to make you think for a sec...). Or in the blowing sand on a rooftop in Fallujah. Those guys need filters on their lenses.
But then again, you might be on the shores of Lake Superior on a windy November day or shooting on the beach in Cayo Coco, Cuba. Sometimes it's smart to have something between the front of your $2000 lens and the elements.
 |
Similar treatments, 5 years apart! (OK, OK. I edited them today!) |
This shot, on the other hand was done without the benefit of a protective filter, in the rain. Pointing up in the sky, so how can the lens not get wet?'But, folks, it's only water...
 |
This is a multi-shot composite and the soft red spots are raindrops on the lens. But I don't think the shot could have happened with a filter on. The rain would have been too much for the image. |
Do you think this image would have come out this sharp with a filter on board?
OK, now down to the nitty-gritty. I ran a survey by the denizens of the TIF forum (I know, someone is going to say that's repetitiously redundant: "TIF" stands for "The Imaging Forum", so I just wrote "The the imaging forum forum"!) and the Richmond Hill Camera Club. As I write this, I have 28 responses, and they break down like this:
 |
Of the people who said No, the added detail was interesting:
There were several comments that accompanied this question: several said they wore filters in bad conditions, some said it was a nuisance when they wanted to use polarizing filters and one said simply, "I use the lens hood".
Next question was this one:
I phoned Nikon. They said, "$280 for an 18-200, $370 for a 70-200". I bet a lot has to do with the size of the front element. So your exposure is NOT the $2000 value of your lens: the filter can only protect the front element. It's under $500 and as one respondent said, "that's what insurance is for".
Half of the respondents or more said they were what I called "semi-pro's". Two people were full professionals, the rest amateurs.
There were some interesting general comments. Two mentioned that 'someone' had dropped their camera and the UV filter took the damage ('someone'. Right). A couple reminded us to use our lens caps in the bag (and use a bag!).
So I'm not hiding my opinion: no filters for me for protection except where conditions warrant. But the lenses were built to take it, it's like not taking your motorcycle out if it looks like it might be thinking of raining because it might get wet. It's up to you, it's your lens. The only directive comment I will make is if you have a $2000 lens, for heavens sake spend more than $10 on the filter if you use one: go shoot a picture through your car windshield and look at it. That's what you're doing with cheap glass.
I might add a footnote or two if more interesting results show up... pop back in a while to see.
PS: the survey is here if you haven't responded and you want to.
Wednesday, July 4, 2012
Shooting Macro on a budget
The bellows works by increasing the distance from the back of the lens to the focal plane. The further away it is, the closer you can focus and the more you can magnify an image. But focusing is EXTREMELY critical; depth of field is measured in millimeters!
Focusing with the bellows can be done 4 ways. With the setup you see above, you can
- use the focusing ring on the lens
- zoom the lens, or
- extend or contract the bellows
I did some light tent shots yesterday, sometimes using a strobe fill, sometimes not. This series was with the strobe but dialled down considerably and through the light tent to diffuse it.
 |
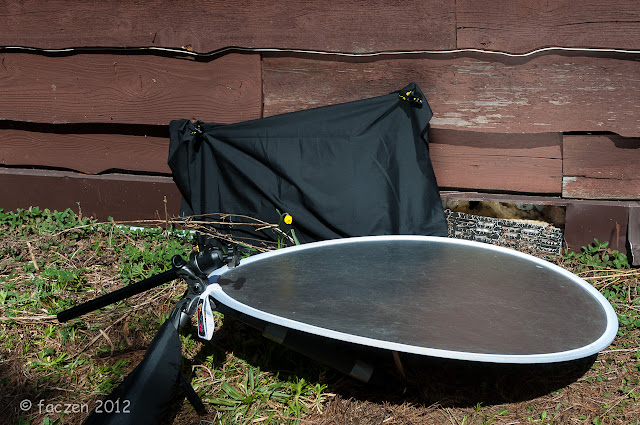
In this setup shot, the strobe is behind the black sweep, so it only illuminates the tent, not the subject. Sometimes I had the strobe further off to the right, but I don't have a setup shot of that. |
As I said, focusing is tricky. I would focus using LiveView with the lens wide open so I could see, then carefully stop down without moving anything. Of course without autofocus or exposure adjustment with the bellows on, everything was manual.
I tried doing a focus stacked sequence but it didn't work. In this case I had 8 exposures but they wouldn't blend. That will be helped by the focus rail (I hope!). If anythng moves in the frame, the layers won't merge right. This was just one image:
Exposure was 2 seconds at f/11, ISO 200. Why so long? As I said, I was shooting with and without flash fill and I forgot to change the setting. If the illumination was flash only, I wouldn't have to; although there's still not a lot of light when you're shooting at f/11. You can see the depth of field when you look at the stem or the furthest petals.
Camera shake and movement is CRITICAL. I used the self-timer function, or Mirror-Up, and a cable release to trip the shutter. Do I have to say it was on a tripod?
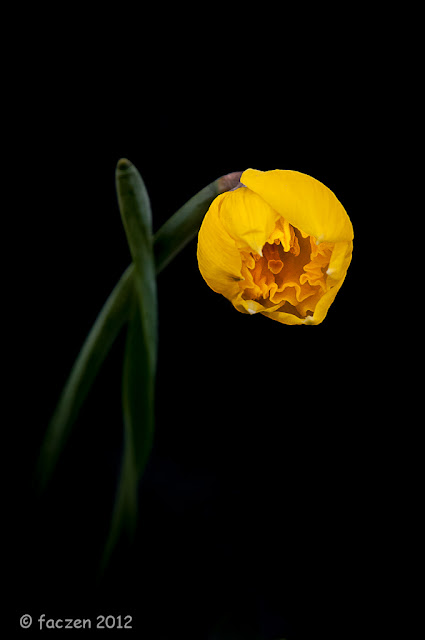
Here's the final image:
 |
Name that flower in 3 notes. I dunno, it's like a little daisy but it's yellow. I'm not a flower expert. |
Now let me tell you what I did to get there.
I took the 8 images into CS6 and tried to focus-stack them but as I said, it didn't work. So I ended up deleting all the layers except this one. Step 1 was a hi-pass filter layer to bring up the detail. After stamping a merged layer, I opened Topaz Adjust 5 (I'm sure you figured that out when you saw the results!) and used the "Psychedelic" preset. I tweaked that some, especially doing some noise reduction. Back to CS6.
Now to get rid of the red bit and some of the background light spill. I created a mask and masked out the flower so it wouldn't affect the content-aware fill, and that's how I removed the extraneous bits. When I was done that step, I discarded the mask. In order to see what was going on with the background, I created a Levels adjustment layer and cranked it WAY up so I could see the mess in the background. I selected the flower and stem, and used the selection to mask the image, then filled what was left with black. After deleting the mask, a few strokes with a brush and the background was monolithic. Next I discarded the levels adjustment layer, it was only there for visibility.
The new crop function in CS6 is neat: I reframed the image, adding room to the left and below and filling the added portion with the same black. Then I used the healing brush and the clone stamp tool to extend the soft focused stem to the left and up. Pretty well done, I took it back into LR4, where I tweaked the crop and added a post-crop vignette, then took out a bit more of the noise. I brought the saturation up a bit and done.
Keep an eye on this blog for more: I'll add more to this tutorial as I experiment a bit more. I especially want to learn to use focus stacking and different lighting. But you can do this stuff on a budget if you want to.
PS: for more images and writeups, it's probably better to subscribe to my other blog – www.faczen.blogspot.com – or drop in to see it regularly. I post there every week, whereas this one is more sporadic. For instance, the lily in the setup picture is going to be interesting but I haven't finished it yet. It will be on the Faczen Image blog.
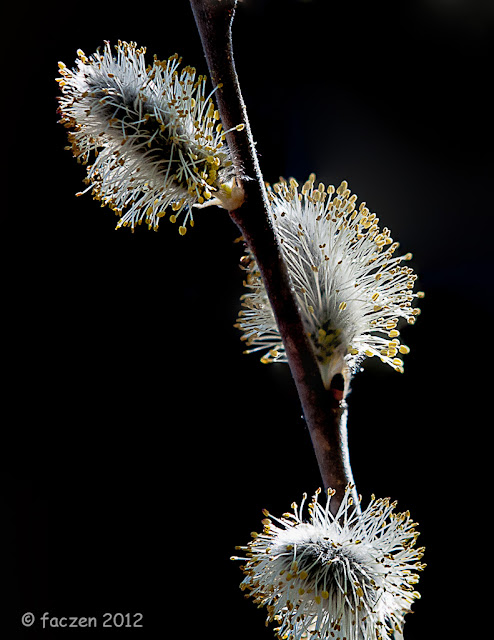
Edit: I added this picture to give you an example of the scale you can achieve with the bellows. This is not cropped.
 |
This is nowhere near the maximum magnification. I guess the bellows was about 1/3 of the way out, the lens was zoomed to about 70mm, I think. |
Friday, April 13, 2012
Black Background on a Budget
A few years ago I shot at an indoor orchid show where they had set up black backgrounds (tar paper or tentest) and the pictures were great!
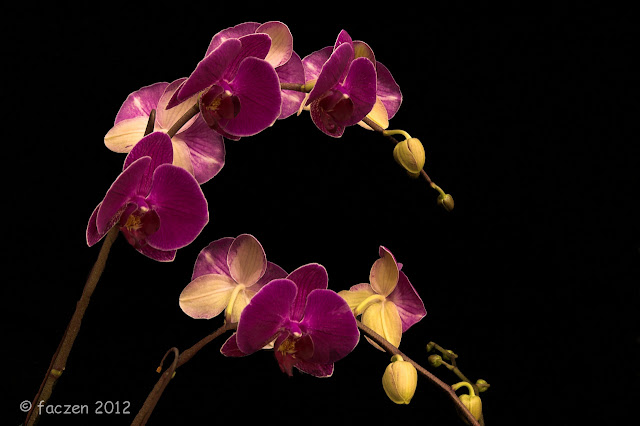 |
This was quite a long exposure, but at f/16 and with off-camera flash (my SB-600 handheld high and to the left). The black background was already set up there by the show organizers. |
This article is NOT about how to light these shots, not really. It's about the backdrop. And how to do it "on the cheap". Also I'm a lazy guy and the less I have to carry with me in the field, the better.
So here's a really cheap and dirty solution.
- Go to a fabric store and buy a square of black cloth. I bought a 1m square piece (I think it was 48"x40" actually) and it cost me $4.
- Go to a hardware store and buy 4 little A-clamps. Sometimes you can get them in a set, but I bought loose ones for $1.99 each.
Next step:
- Use a couple of the clamps to hang up the black cloth behind whatever it is you want to shoot.
- You can also find two sticks, make them in the shape of an "X" and use the clamps to stretch your cloth over the sticks to make a black square thing.
- I also have a pop-up reflector that came in a black bag. You can use that as the backdrop as well for small (macro) shots.
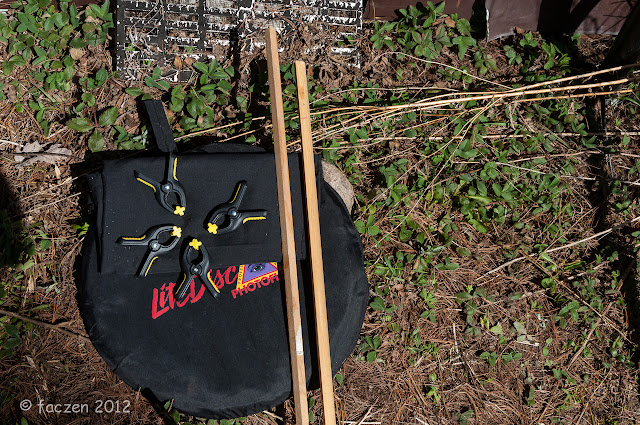 |
Here's all my stuff. One black cloth, four little clamps and two sticks. They're all sitting on top of my reflector disk in its black sleeve, but you don't need that! |
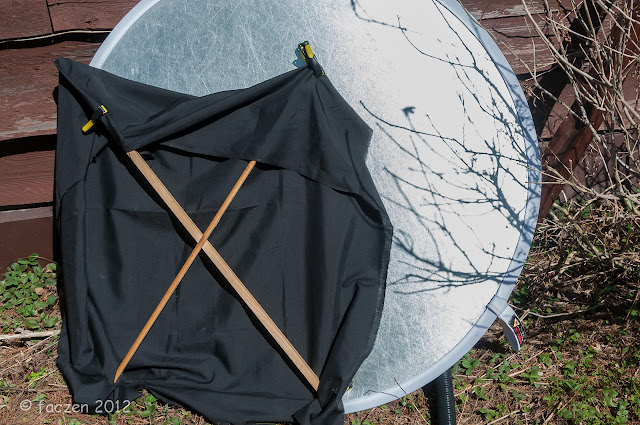 |
This is the setup with the cloth stretched over the sticks. |
There's a good article on how to use an "invisible black backdrop" on Glyn Dewis' blog but for that you really do need flash.
My whole kit is inside my folded up reflector disk bag. Easy to take with me in the field. I'll probably use a separate tripod for positioning the off-camera flash when I go out shooting trilliums next month. I'll post some pictures over on my other blog when I do.
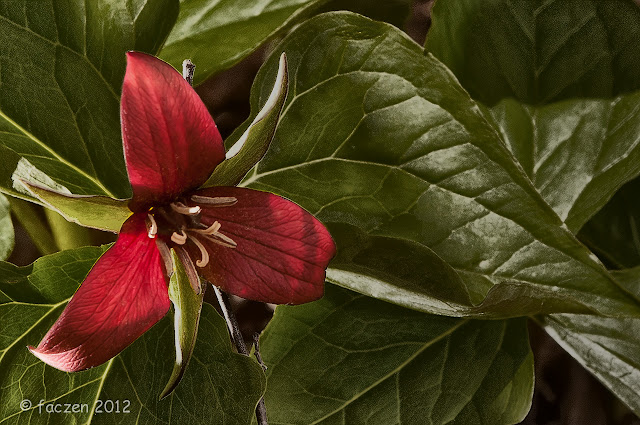 |
Here's a red trillium I shot last year with off-camera flash but no backdrop. 1/160 @ f/8, ISO 200, 200mm |
Saturday, February 11, 2012
Posting Pictures on the NAPP Forum
Note: this will likely become obsolete when the planned upgrade to the NAPP forum takes place. They may change the interface. I'll come back and comment here and try to update this article when that happens.This post is intended for NAPP members who are having difficulty posting pictures on the forum and are therefore not participating in some of the activities.
It’s actually quite easy to upload pictures to the NAPP forum. There are some other threads on the forum that give you various choices and methods, but here’s how I like to do it.
- Choose your picture or pictures and resize them to a maximum width of 800 pixels.
- Upload them to a site on the internet.
- Copy the link to that image
- Select the “picture” icon in the post you’re writing
- Paste the link into the field in the popup box.
- For consistency and of course file size constraints, the NAPP forum allows you to post JPEG images up to 800 pixels wide.
If you’re using Lightroom, simply export with that size limitation. Mine go to a designated folder on my hard drive called, “NAPP” (creative, huh?). I also try to limit the file size to 100K but occasionally they go over that if they’re complex. In Photoshop, the best solution is usually “Save for Web and Devices” and again you can set your size limitations there.
- You need to have a place to put them on the internet, that you can link to. There are a ton of free places: Flickr, Picasa, Photobucket… I’ll leave that to you. But choose one where you can link to the photo, not to the page it’s on. For instance, you can put your pix up on SmugMug (if you have an account) but finding the link to that particular picture is convoluted.
- Now I write the message I want to post on the forum. I put the cursor where I want the picture to appear (looks best with a couple of blank lines before and after it) and I click the “picture” icon in the menu bar. A window pops open that lets me paste the URL I copied in step 3 into the field and when I hit <Enter> it automatically puts the following code in the message:
After I’m done, I usually like to go back and highlight that line, then click the “center” icon because I think it looks better if the picture is centered in the post.


